Airtable Tutorial: Remote Jobs
Introduction
This is a getting started tutorial to create a site from an airtable with TableWS.
This is just the simple listing for companies, this is the resulting site: https://jobs.pagews.app/
This tutorial is focused on just the home page, you can complete the site individual pages and positions on the next tutorials.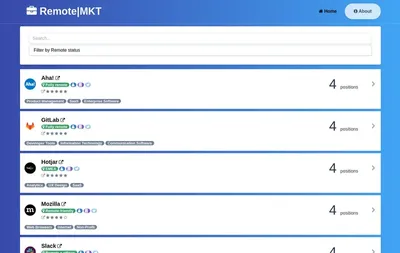
Prerequisites
You need to create an airtable account and clone the next base:
https://www.airtable.com/universe/exp6NO4eswB5IFvmX/remote-marketing-jobs?explore=true
You need to create a tablews account here:
https://app.tablews.com/auth/app/register
Once you create an account you will have a domain to work with like in the next image: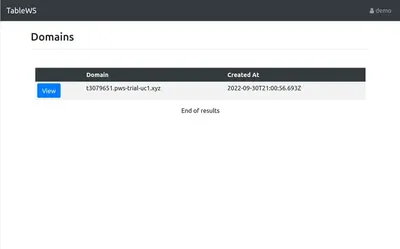
Tailwind template
The first step that we need to do is to initialize our site, the site is a blank canvas at the beginning, you could initialize your site with bootstrap, tailwind, mvp or more templates.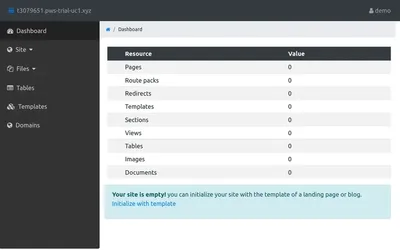
You could skip this initialization option if you want to include your files and configure your site at your convenience.
We are going to select the Remote Jobs template that is using the Tailwind css library.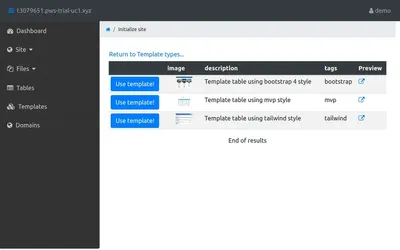
Pages & Sections
Once you select the template and initialize your site you can see that a couple pages and sections are created.
We are only working with the home page for this tutorial.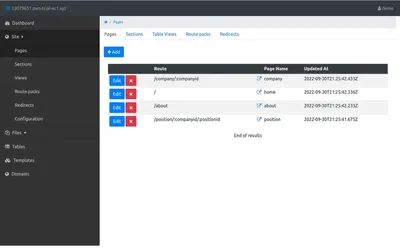
Also the navbar and footer sections were created, the sections are content snips that you can include in any site as common content.
The Data Table
Now we are going to create a data table, we need to provide a name and its type, we are going to name it companies and type airtable.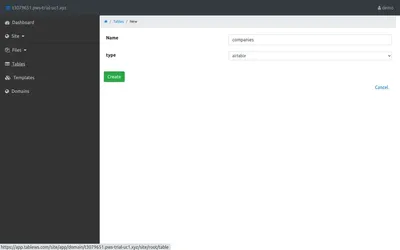
After this you need to provide the Key, ID, base and view for the airtable base: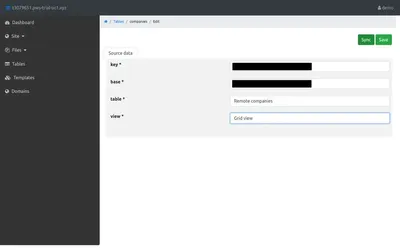
After you save it you will see the table data displayed on the UI.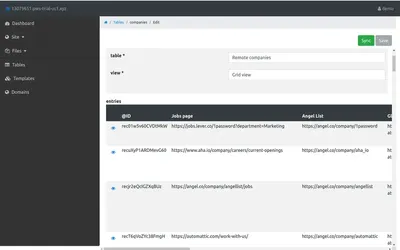
Create a View
Now with our table ready the next thing to do is to create a view.
A view is a query + template combo to help us query data from different tables and a way to render the result using a html template.
Go to Site -> View and create a view named companies
The first step is to query the data that we are going to use in our template, you can use the integrated sql Query editor and see the results on the Execute tab, here is a image of the query for this tutorial, you can find the query here: https://raw.githubusercontent.com/vicjicaman/tablews-docs/main/jobs/companies/query.sql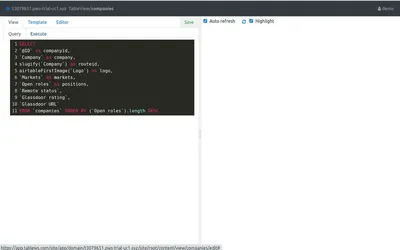
Once we have the data the next step is to render the results using a ejs template, check the ejs documentation for more details: https://ejs.co/
Here is the template for this tutorial, copy and paste it on the Html tab.
https://raw.githubusercontent.com/vicjicaman/tablews-docs/main/jobs/companies/html.ejs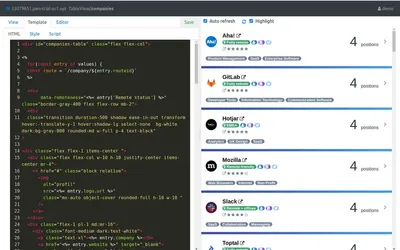
If you want a better presentation add a frame on the Editor tab, here is the frame snip:
https://raw.githubusercontent.com/vicjicaman/tablews-docs/main/jobs/companies/frame.ejs
The home page
After creating the view lets go to the home page, this is one of the pages that were created during the template initialization.
You can see that the page has 3 elements, the navbar and footer sections and a table-view.
Since we are using the same view name as the template you should go to and you can visit your catalog page live!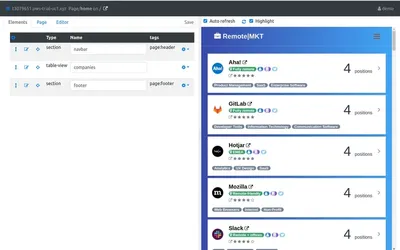
Filters
There is a way to easily add filters for your table, you need to define the filters using javascript, I am working on a UI helper for this.
You can find the code snip here, copy and paste it to the Script tab of the companies view:
https://raw.githubusercontent.com/vicjicaman/tablews-docs/main/jobs/companies/script.js
Next steps
The next tutorial is to create an individual page per company, we are going to add the functionality for the /company/:companyid page, you can find the next tutorial here